What are the essential design elements for an outdoor patio in Hampton Roads?
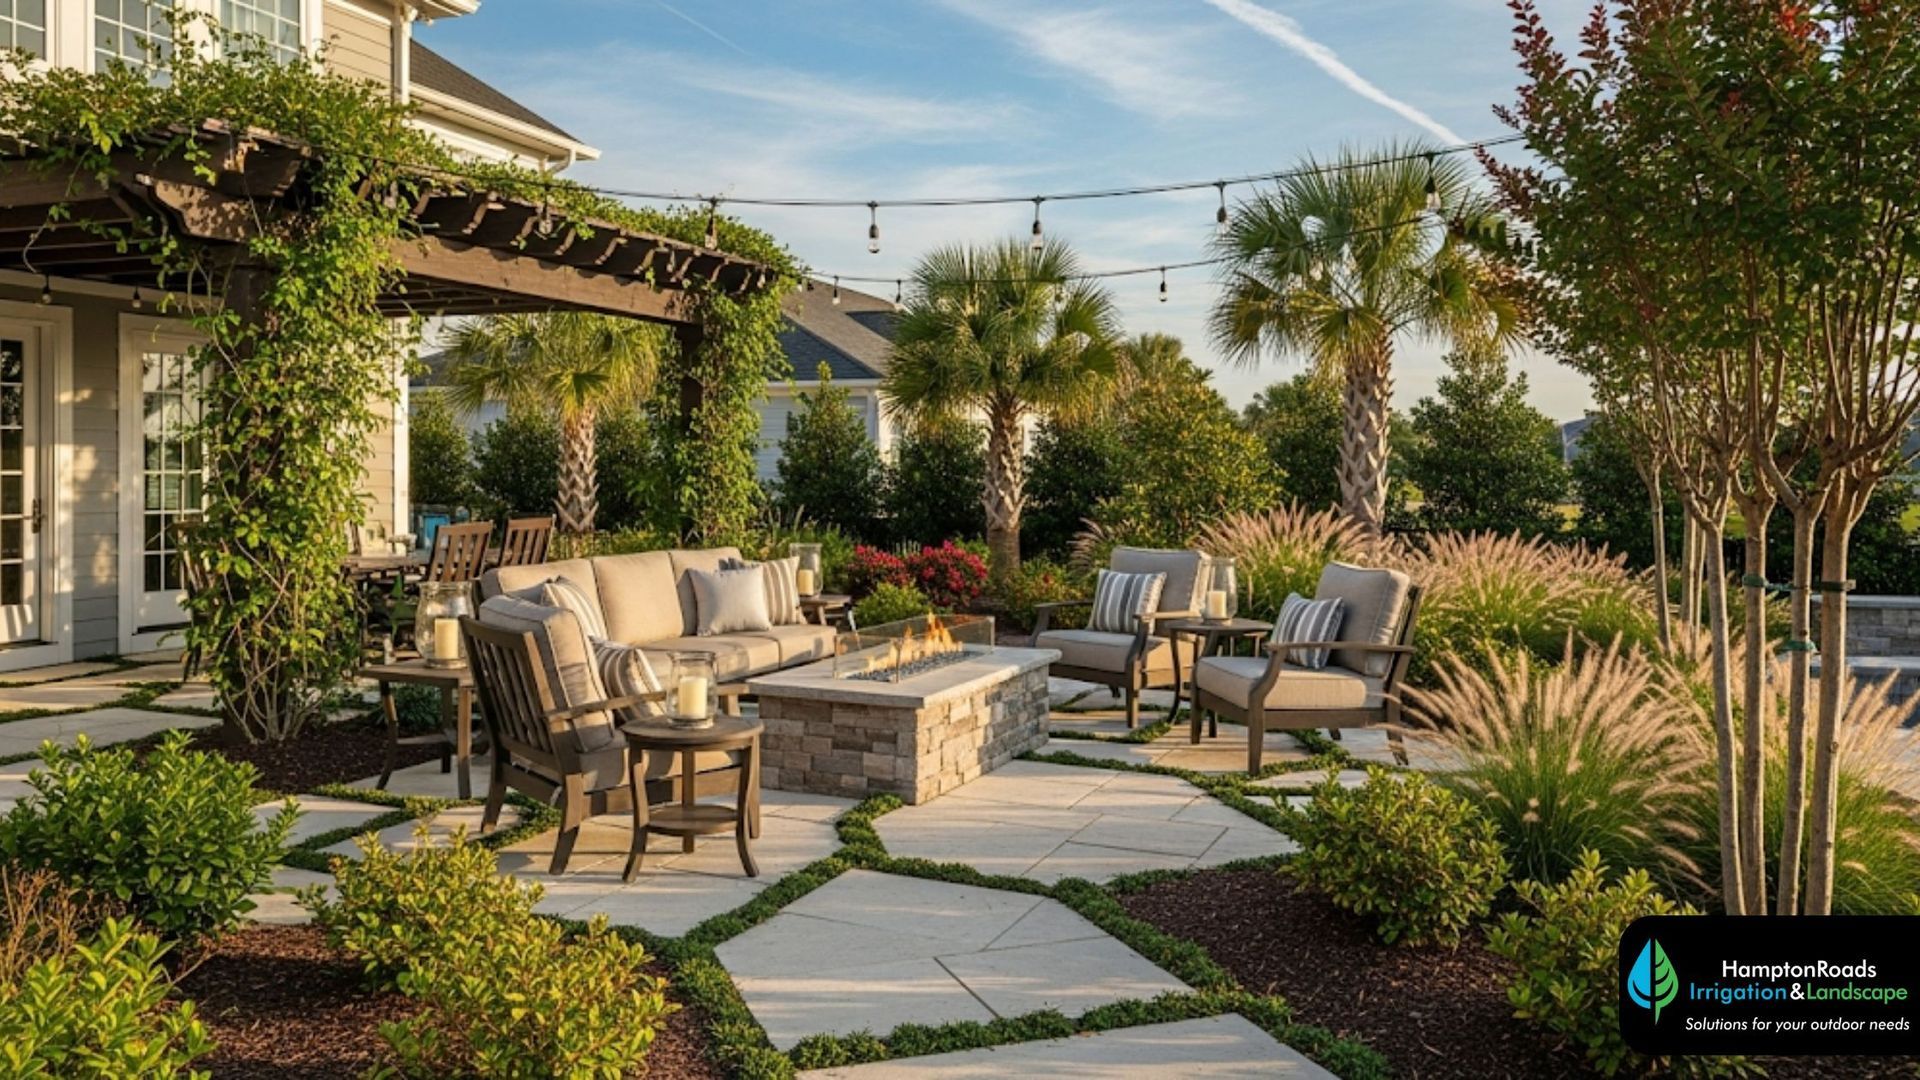
Waking up one morning, drenched in golden sunlight and greeted by the whisper of ocean breezes, you know it’s time to elevate your backyard experience. Outdoor Patio Hampton Roads projects aren’t just about paving stones and furniture—they transport your living space into a sanctuary where memories are made. Imagine laughter dancing across a glowing fire pit, the aroma of grilled delights in your outdoor kitchen, and the gentle glow of layered lighting as day turns to night. Crafting that perfect escape within your coastal yard demands both creativity and practical know-how. Let’s dive into the essential elements that will transform any space into a stunning Outdoor Patio Hampton Roads masterpiece.
What are the best patio ideas for a Hampton Roads backyard?
When designing your backyard oasis, zoning plays a pivotal role. By dividing your space into dedicated areas—dining, lounging, cooking, and fire-gathering—you guide movement and foster intimate experiences. Picture a raised seating area nestled by ornamental grasses, leading guests toward a built-in fire pit surrounded by cushioned benches. Each zone feels distinct yet remains visually connected through complementary textures, colors, and plantings. This approach turns a simple outdoor room into a multi-functional retreat tailored to your lifestyle.
Creating a seamless transition between indoor and outdoor living amplifies comfort and encourages year-round use. Sliding or folding glass doors, pergolas that echo interior ceiling heights, and matching flooring materials all blur the line between home and garden. A low-profile deck or sunken patio can act as a bridge, bringing guests down from your living room into an al fresco lounge. Soft area rugs, accent pillows, and weather-resistant throws further tie interior décor and exterior design together, inviting you to linger long after the sun sets.
Layered materials add depth and sophistication to your landscape. Combine natural stone pavers with rustic brick accents for visual interest underfoot. Integrate crushed seashell pathways or pea gravel seating pockets for a tactile change in texture. Subtle changes in elevation—like a single stone step or wedged limestone ledge—introduce dynamic sightlines without sacrificing accessibility. These intentional contrasts in pattern, color, and finish ensure your patio feels curated rather than cookie-cutter.
Finally, framing your patio with lush plantings softens hard edges and integrates your design into the coastal environment. Native grasses such as muhly grass and fountain grass sway in the ocean breeze, while salt-tolerant shrubs like yaupon holly and bayberry create year-round structure. Climbing vines on a pergola—jasmine, clematis, or honeysuckle—add fragrance and seasonal blooms overhead. By weaving hardscape and softscape elements, you achieve a balanced, immersive outdoor room that resonates with Hampton Roads’ maritime character.
Creating Outdoor Living Zones
Designing specialty zones for cooking, dining, and relaxation helps you maximize functionality. A dedicated grilling station adjacent to a prep counter ensures chefs aren’t isolated from guests. Nearby, an al fresco dining table under a retractable shade sail offers relief from midday sun. Across the way, a sunken fire pit invites conversation well into cooler evenings. Thoughtful placement of these zones keeps foot traffic flowing naturally and encourages everyone to explore the entire space.
Seating choices also define each zone’s purpose. Use weather-proof sectional sofas to craft a cozy lounge area, accented with removable weather-resistant cushions for easy cleaning. Bar-height stools around a built-in grill island foster casual dining and social cooking. Dining chairs with decorative backs create a more formal atmosphere under a pergola draped in vines. By selecting distinct seating types and arranging them according to use, each patio zone takes on a clear role without walls or partitions.
Lighting further reinforces each area’s identity and extends usability into the evening. Recessed deck lights lining walkway edges guide guests safely between zones. Under-counter LED strips illuminate the outdoor kitchen workspace for late-night snack prep. Overhead string lights arranged in a radial pattern above the fire pit become an instant focal point after dark. By layering functional and ambient fixtures, each zone maintains its character from dawn to dusk.
Combining Decks and Patios
A hybrid deck-patio combination delivers distinct levels that elevate your outdoor experience—literally. Raised wooden decks can anchor seating and dining zones, offering views over a lower-level paver patio dedicated to fire features or water elements. This arrangement not only accommodates slight changes in grade but also delineates use areas without fencing. For coastal yards with gentle slopes, decks allow you to step down into the landscape, while patios provide a solid, ground-level foundation.
Opt for composite deck boards in rich cedar or driftwood tones to mimic classic hardwood without ongoing maintenance. Below, select interlocking concrete pavers in warm taupe or sand-colored hues for your patio. A shared color palette between deck trim and paver grouting unites the two surfaces visually. Intersperse planting pockets or raised garden beds at the transition to soften the edge and introduce greenery between levels. The result? A cohesive multi-layered outdoor living suite.
Multi-story homes in Hampton Roads benefit greatly from upper-level decks leading to lower patios. Guests can gather upstairs for cocktails amid string-light bistro sets, then descend a wide, built-in wooden stair to lounge by the fire pit. Ushering conversations from one level to the next adds drama and encourages exploration. Integrating rail planters loaded with hardy succulents or coastal flowers as balustrades enhances safety and aesthetics simultaneously.
How to Choose Materials for Outdoor Patio Hampton Roads?
Outdoor Patio Hampton Roads projects require selecting durable, weather-resistant materials suited to coastal conditions. High-quality concrete pavers with chamfered edges endure salty air and resist cracking under sun exposure. Porcelain tiles designed for outdoor use offer a sleek, low-maintenance option that mimics natural stone without porous weaknesses. Composite decking integrates recycled plastics and sustainable wood fibers to deliver the warmth of timber without rot or splinter concerns. Focusing on longevity ensures your investment stands up to wind, rain, and routine foot traffic for years to come.
Porcelain pavers engineered for freeze-thaw cycles are particularly well-suited to the Hampton Roads region, where salt spray and humid summers dominate. Their color range—from soft ash grays to warm travertine-inspired tones—lets you coordinate seamlessly with your home’s façade. To prevent slips, choose textured finishes or pavers with slight embossing. Proper base preparation, including a compacted stone aggregate layer and geotextile fabric, ensures consistent support and deters underlayment shifts. This solid foundation keeps your patio surface flat and level, minimizing long-term maintenance headaches.
Natural stone remains a timeless option for those seeking authenticity. Range from classic bluestone and slate to sandstone and oyster shell-infused limestone. While stone requires periodic sealing, its visual depth and irregular patterning contribute a handcrafted appeal that synthetic materials often lack. Lighter stones reflect heat on hot summer days, making bare feet more comfortable. For a cohesive look, you can combine stone flagging in seating areas with complementary brick or cobblestone borders.
When budget and aesthetics intersect, consider high-performance concrete overlays. Modern stamping techniques replicate wood grain, cobblestone, and tile patterns without the cost of natural materials. Integral pigments ensure enduring color, and acrylic sealers maintain sheen without yellowing. Effective water drainage and skillful joint placement allow confident installation even on larger patios. Balancing cost, style, and resilience opens the door to a tailored material selection that stands the test of Hampton Roads’ coastal elements.
In planning your patio materials, lean on expert insights and case studies through our Durable Patio Materials resource, which details the pros, cons, and maintenance tips for each surface option.
How can I integrate an outdoor kitchen into my patio design?
An outdoor kitchen becomes the heart of backyard entertaining, blending culinary functionality with social connectivity. Position your cooking zone near indoor plumbing and gas lines to minimize installation costs and complexity. A U-shaped grill island with a stainless steel hood, storage drawers, and built-in mini-fridge accommodates multiple chefs prepping simultaneously. Overhead shade from a custom pergola lined with UV-rated fabric keeps temperatures comfortable during summer grilling marathons. Surround the island with bar-height stools so guests can chat with the cook without crowding the workspace.
Countertop choice elevates both form and function. Polished granite resists heat and stains while maintaining a luxurious appearance. Composite quartz options deliver consistent patterning and resist bacterial growth, making cleanup a breeze. Integrate recessed magnet racks and knife blocks along the backsplash for immediate access to essential tools. Lighting beneath upper cabinetry ensures meal prep under any sky. When designing your layout, aim for a triangular work flow—prep zone, cooking surface, and plating area—to maximize efficiency.
Incorporating appliances beyond the grill broadens the menu possibilities. A side-burner encourages sauce simmering or stir-frying, while a built-in pizza oven adds an artisanal touch. An under-counter ice maker or kegerator keeps beverages chilled within arm’s reach. Refrigerated drawers hidden beneath countertops preserve ingredient freshness and prevent back-and-forth trips indoors. For extended gatherings, consider a warming drawer to hold dishes at serving temperature, ensuring each guest enjoys a hot bite.
Finishing details tie your outdoor kitchen into the larger patio aesthetic. Veneer stone or stucco panels on the island base reinforce the material palette you selected for the patio floor. Accent strips of chevron-patterned tile behind open shelving infuse personality and color. Planter boxes at the counter’s end can feature fresh herbs for direct harvest, adding scent and visual interest. With careful coordination, your cooking area feels like a natural extension of the surrounding outdoor living suite.
What lighting solutions work best for an outdoor patio in Hampton Roads?
Effective lighting transforms an outdoor patio from a daylight destination into a captivating evening retreat. Start with broad-spectrum area lighting, such as recessed deck fixtures or low-voltage bollard lights lining walkways. These provide safe navigation and a base layer of illumination. Accent lighting—uplights on specimen trees or wall-mounted sconces highlighting architectural features—adds drama and depth. Finally, ambient fixtures such as string lights, lanterns, and candle-lit votives create a warm, inviting glow that encourages guests to linger.
To explore curated examples of fixture mixing, refer to our Outdoor Patio Lighting Ideas gallery, where different combinations of LED strips, pendants, and path lights demonstrate how layering creates versatile nighttime environments.
Integrate dimmers and smart controls to adjust brightness levels and color temperatures at a moment’s notice. During an intimate dinner, choose warm white bulbs at low wattages for a cozy glow. When hosting a lively gathering, increase brightness to ensure safe foot traffic and lively conversation. Weatherproof switches and app-enabled controls allow you to program sunrise-to-sunset schedules or zone-specific scenes, preserving battery life and enhancing convenience.
Consider fixture placement early in the design phase to avoid post-installation headaches. Conceal wiring beneath paver joints or within hollow deck planks to maintain clean lines. Use recess-mounted step lights on stair treads for subtle safety cues. Hang pendants from pergola rafters to define dining zones without sacrificing headroom. Porcelain or aluminum fixture housings resist corrosion from salt air, ensuring that your investment looks crisp for seasons to come.
Ultimately, balanced lighting reinforces the cohesive narrative of your patio design, guiding the eye across hardscape patterns, accentuating landscape plantings, and highlighting the focal points—be it a fire pit, water feature, or outdoor kitchen.
What safety features should I consider when adding fire pits and heating elements?
In Hampton Roads’ coastal environment, fire elements serve a dual purpose: functional warmth and aesthetic focal point. Gas fire pits offer instant ignition and adjustable flame heights, paired with remote or app control for added safety. Wood-burning pits deliver authentic crackle and aroma but require strategic clearance from structures, proper spark screens, and masonry or fire-rated material underfoot. Always adhere to local code setbacks from property lines, overhead canopies, and combustible plantings to reduce fire hazards.
For gas installations, enlist a licensed professional to connect lines, pressure-test valves, and verify proper orifice sizing. Opt for stainless steel burners and brass valve stems that resist corrosion. Install flame-sensing shutoff devices to automatically cut fuel supply if winds extinguish the fire. Surround your pit with non-combustible materials such as bluestone or concrete pavers to contain stray embers. Durable fire glass or ceramic logs can replace traditional wood, minimizing ash and maximizing heat distribution.
Seating configurations around the fire feature are equally important. Low-profile benches with masonry bases create a cohesive hearth environment. Backless stools can tuck beneath ledge seating to maintain clean sightlines. Retain a minimum of 36 inches between the fire bowl and seat edge to prevent heat discomfort or accidental contact. For elevated decks, verify the load-bearing capacity and use fire-rated deck plates beneath gas connectors to meet building safety standards.
Don’t overlook wind patterns when positioning your heat element. Coastal breezes can redirect smoke and sparks toward seating or adjacent structures. Perform a site analysis at different times of day to track prevailing winds. If necessary, build a wind block using stone half-walls or dense shrub hedges that maintain airflow while deflecting smoke. Consistent safety planning ensures that your fire pit remains a reliable gathering spot no matter the season.
How can landscaping and irrigation enhance my patio space?
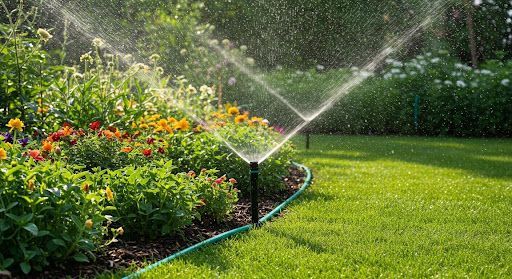
Thoughtful planting schemes soften hardscape edges and integrate your patio into the broader landscape. Coastal-adapted specimens—such as muhly grass, yaupon holly, and seaside goldenrod—thrive in sandy soils and salty air, reducing maintenance demands. Place taller shrubs or small trees behind seating zones to create a living privacy screen. Use colorful perennials like coneflowers and black-eyed Susans in border beds to draw the eye along pathways or frame focal points.
Drip irrigation and smart controllers deliver precise hydration without overhead spray that soaks guests and furniture. Soil moisture sensors ensure that your plantings receive water only when needed, promoting deep root growth and drought resilience. Rain-sensor integration prevents system activation during storms, conserving water and avoiding soggy conditions. When combined with zone-specific scheduling, irrigation becomes an unseen ally in maintaining lush, vibrant greenery year-round.
For inspiration on coordinating irrigation with hardscape features, trust our team at Hampton Roads Irrigation & Landscape, where each project synchronizes layout, grading, and water delivery to foster balanced growth.
Planter boxes and raised beds adjacent to patios provide opportunities for edible gardens. Fresh herbs—rosemary, thyme, oregano—sit at arm’s reach from your outdoor kitchen. Compact varieties of cherry tomatoes and peppers in decorative containers add color, fragrance, and flavor without overwhelming space. Use self-watering planters or add capillary mats to minimize care requirements.
By weaving irrigation, plant palette, and hardscape in a unified design, you cultivate an outdoor sanctuary that feels both natural and meticulously maintained.
How to maintain and care for your patio in a coastal environment?
The proximity to salt air and humidity in Hampton Roads makes regular maintenance essential for preserving beauty and safety. Sweep debris and leaves weekly to prevent organic buildup, which can stain porous surfaces. Use a mild detergent solution and soft-bristle brush to scrub pavers or tiles quarterly, rinsing with clean water to avoid soap residue. For composite decking, follow manufacturer guidelines—typically requiring only soapy water and a rinse to remove dirt and mildew.
Sealing stone and grout every one to two years protects against salt penetration and moisture erosion. Choose breathable sealers that repel water while allowing vapor diffusion, preventing blistering or discoloration. Inspect seals annually, especially on horizontal surfaces subject to foot traffic. Promptly address small cracks or grout loss with patching compounds to prevent larger failures and costly repairs down the line.
During hurricane season or extreme storms, secure loose furniture, cover appliances, and clear planters of lightweight contents. If your locale mandates a storm shutter or roof overhang cover, make sure pathways and exits remain unobstructed. After high-wind events, inspect fixtures, railings, and pergola connections for looseness or damage. Early detection and remediation keep your outdoor space safe and ready for swift post-storm enjoyment.
Routine attention to cleaning, sealing, and storm prep ensures that your coastal patio remains inviting and structurally sound for decades.
Frequently Asked Questions
What are the best patio design ideas for coastal homes in Hampton Roads?
Coastal patio designs focus on durable, weather-resistant materials—like porcelain pavers and composite decking—paired with maritime color palettes of soft blues, sandy beiges, and driftwood grays. Incorporate multi-level layouts or sunken seating for dynamic visual interest. Use plantings native to the Tidewater region, such as Muhlenbergia capillaris (pink muhly grass), to reinforce a sense of place. Layer lighting—from recessed deck lights to pendants—to extend usability into the evening.
How much does it cost to install a patio in Hampton Roads?
Installation costs vary based on size, materials, and site complexity. Simple concrete patios start around $15 per square foot, while high-end porcelain or natural stone installations can reach $35–$60 per square foot. Labor rates in the region typically range from $50–$100 per hour for skilled masons. Additional features—like built-in fire pits, outdoor kitchens, and pergolas—add to the overall budget. Always obtain detailed quotes and verify contractor licenses before committing.
What materials are best for patio durability in a coastal climate?
Porcelain pavers engineered for outdoor freeze-thaw cycles resist moisture absorption and cracking. Composite decking combines recycled polymers with wood fibers for a robust, splinter-free surface. Natural stones—bluestone, slate, quartzite—offer timeless aesthetics but require periodic sealing. Consider textured finishes or anti-slip coatings for safety during wet conditions. Proper base preparation with compacted aggregate underlayment ensures long-term stability regardless of material choice.
How can I integrate an outdoor kitchen into my patio design?
Begin by mapping existing utility connections for gas, water, and electricity to minimize installation costs. Design a U-shaped cooking station with ample prep space, storage, and seating. Select stainless steel appliances for corrosion resistance and longevity. Add features like a side burner, pizza oven, and refrigerated drawers to broaden cooking capabilities. Use matching stone or tile veneers from your patio surface to visually tie the kitchen island into the overall design.
What are the safety considerations for fire pits on patios?
For gas fire pits, always work with a licensed professional for line installation and pressure testing. Maintain clearances of at least 36 inches from combustible materials and structures. Use fire-rated pavers or stone as the hearth base. Consider wind patterns and install spark screens or tempered glass wind guards to prevent ember scatter. Regularly clean burner ports and inspect gas connectors for leaks or corrosion.
Conclusion
From intelligent zoning to material selection and the right balance of lighting and greenery, crafting the ideal Outdoor Patio Hampton Roads space demands both vision and technical precision. By dividing your yard into multi-functional zones, choosing high-performance pavers or composite decking, integrating gourmet outdoor kitchens, layering thoughtful fixtures, and weaving in coastal plantings with efficient irrigation, you create a sanctuary that endures both seasons and shifting tides.
Ready to turn your vision into reality? Please Contact us today to schedule a personalized consultation and bring your dream patio to life.
Our qualified professionals at Hampton Roads Irrigation & Landscape handle everything from initial design renderings to final installation, ensuring a seamless project flow tailored to your needs.
At Hampton Roads Irrigation & Landscape, we specialize in transforming ordinary backyards into extraordinary Outdoor Patio Hampton Roads experiences—complete with durable materials, eye-catching fire pits, gourmet outdoor kitchens, and lush, irrigated plantings for enduring coastal elegance.


How to Winterize Your Sprinkler System Effectively: Expert Steps for Freeze Protection and Longevity

How to Winterize Your Sprinkler System Effectively: Expert Steps for Freeze Protection and Longevity